
I’ve got many requests to share the frequency separation method I use for skin retouching in Photoshop.
Finally, I’m writing it all out. In the simplest way possible!
First, I want to make it clear that through skin retouching, our goal is to enhance the skin’s texture and not make it buttery smooth with no pores at all.


A perfect retouch is a combination of various steps ranging from correcting skin tones, enhancing makeup, eyes to fixing flying hair.
In this tutorial, we will be covering the frequency separation method of high-end skin retouching in Photoshop.
Even if you’re a newbie, it will be easy to follow through.
Let’s begin.
Table Of Contents
High-end Frequency Separation in Photoshop
If you don’t have a RAW portrait image to try out skin retouching on, you can free RAW portraits for practicing retouching from Retouch Academy Lab.
Here’s the download link to the portrait I’ll be retouching in this tutorial.
Removing small bumps and blemishes
Open the portrait in Photoshop and create a Black and white layer by clicking on the fourth icon from the right. It looks like a half-colored circle, refer to the screenshot below.

Now, a properties window will pop up. In it, pull down the reds and raise the yellows.
This will make the bumps more visible on the skin.

Removing the blemishes is the first step in skin retouching.
Remove them using the spot healing brush tool, but before that, you have to make a duplicate layer.
A copy of the original layer so that it is easier to undo a mistake as the original picture is untouched.
To create a duplicate layer, click on the layer to select it and press Ctrl + J for Windows and Command + J for Mac.

The smaller the size of your brush, the finer will be the removal of the blemishes.
Delete the black and white layer when you’re done with this step.
Create high-freq and low-freq layers

Make 2 copies of the duplicate layer like we did before by pressing Ctrl+J on Windows and Command+J on mac.
Rename the layer on top as high for high frequency layer and the layer below it as low for low frequency layer.
To rename a layer, double-click on its name and it will become editable.
Working on the high-frequency layer
Select the layer we renamed as high by clicking on it.
Go to Filter > Other > High Pass.

This is an important step. The value you choose for the high pass filter determines how fine your skin retouching will be.
You can increase or decrease the value of high pass filter using the slider shown in the window.
Start from 0 and slowly increase the value using the slider.
You will notice that the details in the picture become more and more visible as your value increases.
There shouldn’t be any halos, that is when you should know that you’ve over done it.

Keep the value high, but only high enough that you see all the details without any visible halos.
Note down and remember the value of the high pass filter and click okay.
Here the value I stopped at is 6.4.
Keep the high frequency layer selected and change its blend mode to linear light and opacity to 50%. (See the image below)

Also Read: Things every product photographer needs
Working on the low-frequency layer
Click on the low frequency layer, the one we named low by clicking on it.
Go to Filter > Blur > Gaussian Blur.
Put the same value that you used in the high pass filter. In my case, that value was 6.4.
So, I have gaussian blur with a value of 6.4 to the low frequency layer.

After applying the gaussian blur to the low frequency layer, the portrait on your screen will look the same as it did originally. Nothing changed.
To see this more clearly, group the high and low layers together and turn them off/on to notice that it looks the same.
How to group the layers?
Click on high layer, keep Ctrl pressed and click on low layer. Now press Ctrl+G to group them.
You can toggle their visibility by clicking on the eye icon infront of the group title.
Also Read: Get free LUTs in Photoshop
The Final Step
Select the low layer. We’re going to convert it into a smart object.
Keeping the layer selected, right-click anywhere in the blank space on the layer and select convert to smart object.
Still, keeping the low layer selected, go to filter> blur> gaussian blur.
Increase the value of the blur to the point where skin has the best texture, a natural one.

I’ve set the gaussian blur to 36.0.
After applying the gaussian blur, click on the white rectangle you see below the layer. (Smart filter written infront of it, see the image below)

Click on it and then press Ctrl+I to invert it.
You will see that the gaussian blur you applied to the image is now not visible.
Keep this smart filter selected, and choose the brush from the tools panel on the left.
Make sure that the white box is on top of the black box. You can toggle them by clicking on the arrows above them.

As you might have already noticed, the smart filter’s rectangle was white before and after you inverted it (Ctrl+I) it became black.
And now our brush is white.
So, the gaussian blur we applied to the portrait will be revealed only on the white areas which we can paint using the brush.
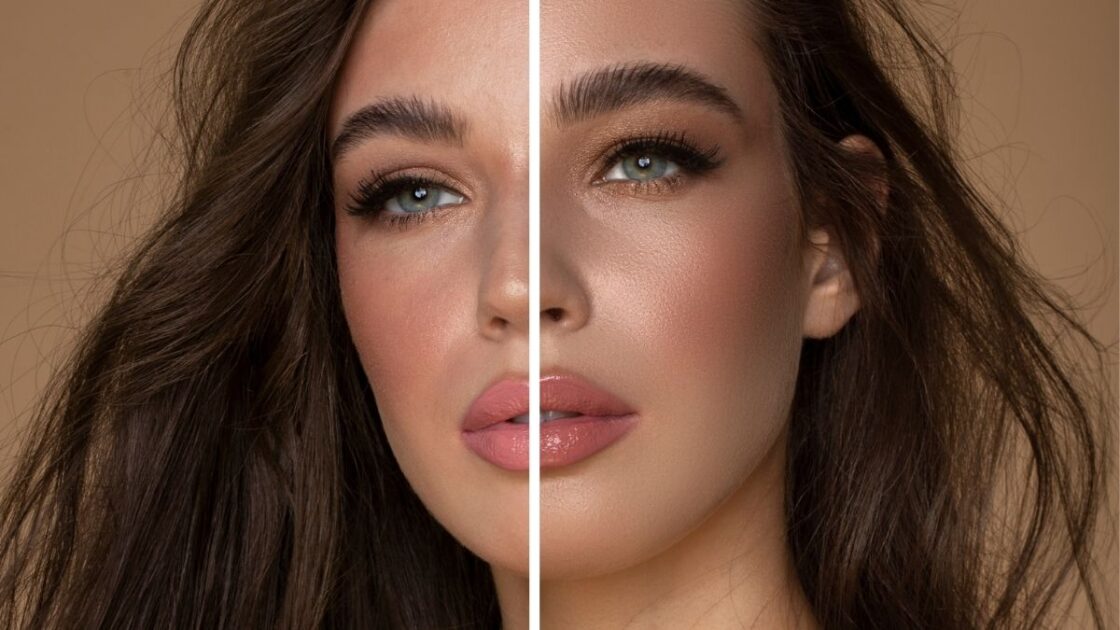
Skin Retouching – Before & After
[bafg id=”14737″]
And that’s all!
I color graded and enhanced the makeup later. Tutorials to be up soon!
Enhancing makeup & color grading
[bafg id=”14739″]
Original & the final picture
[bafg id=”14740″]
If you have any queries, let me know in the comments below.

Subscribe to never miss a post!
Leave a Reply